
The glue is ready to use now, but I'm told that if it sits around a day or so, it develops a slightly more complex molecular structure, and becomes stronger. Regardless, I'm not ready to use it all now anyway.
I'll pour my glue into a paper cup and put it in the refrigerator to gel. It then has the consistency of concentrated gelatin, which is, after all exactly what it is. I'll take the glue out of the cup and cut it up into little chunks for easy handling:
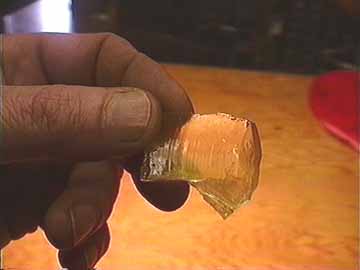
Look at this clear and transparent this 1/2" thick chunk of glue. It has not even the slightest tendency to stain the wood. Hide glue can be anywhere from dark brown to clear like this and there is no difference in the strength. It's just a matter of how much micro-filtration is used in the manufacturing process.
I keep a big jar of these little chunks in the refrigerator, about enough for 3 weeks' work. When it's time to use some hide glue, I fill my beaker from the hot water tap and stick it in the microwave for about 40 seconds, until it reaches 150 degrees. Then I pop open the refrigerator jar, stick a brick in a hot sauce cup, clip the cup to the side of my beaker and go to the workbench:
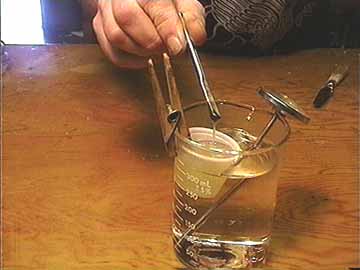
By the time I get my clamps set up, my glue has melted, the whole business has only cooled to about 140 degrees, and I can use my glue.
I can even just take the little cup out and have it right where I need it on the instrument, so I don't lose any time or make drips getting the glue where I want it. After my glue job, the plastic cup and disposable brush hit the trash, and my cleanup is done!
Some time later I'll have more to say about gluing procedure, but for now, don't forget to read my hide glue data sheet.